Using VirtualBox for the Splunker Udemy course
Using VirtualBox for the Splunker Udemy course
Posted June 15, 2018
Last updated February 23, 2019 | 2c29b4f
10 minute read
Table of Contents
At work, we’ve been looking to take better advantage of our local Splunk infrastructure. It’s a bit lacking in its current state, so I have been looking into kicking it up a notch for that sweet, sweet in-depth look into what’s going on in our environment. Now as you can imagine, Splunk is a very large and daunting beast at first glance. There are seemingly infinite ways to use it depending on what exactly you want to get out of it, and you can really get a lot out of it if you want to.
To aid me on my journey, I went to my favorite resource, Udemy. I found a course with good reviews, and it sounded like it’d be a good place to get my feet wet and learn the basic processes, terminology, and ideas behind when, how and where it can be best utilized. Going in, I realized I’d have to have at least one Splunk install, and all along I planned on running it in a local VM so I didn’t have to install it on my work-issued Windows laptop and dirty up the C: drive with all of the files and folders Splunk would bring. My mind has been poisoned by using Docker for so many services.
Anyway, once I got half way through the first section, I started getting Splunk ready on a local Ubuntu VM host, and I thought I’d share how I got everything set up to use with this class in case anyone else is looking to take it and would like to set up a little local lab.
For all of the screenshots and instructions, they will be specific to running Ubuntu Server 16.04 on VirtualBox 5.2.12 r122591
Creating a new Ubuntu VM 🔗
First, we’ll go into VirtualBox and provision a new VM. This is pretty straight forward, but figuring out the networking made me scratch my head a bit. Coming from using VMware Workstation Pro in my home setup, it took a bit of changing my thinking to understand how I’d need to get the networking set up how I was wanting to use it.
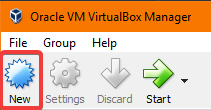
At the main screen in the VirtualBox client, click New to get started with our new VM.
Name the first VM something like Ubuntu-Splunk1. Go ahead and choose the default settings, except the disk size. Set this to 20-25GB rather than the default 10GB. This is to give space to store log files, as Splunk likes to have 5GB free on the disk to be safe. Continue with the installer, pressing Next until it is finished. Afterwards, go ahead and do the same process, but name the VM Ubuntu-Splunk2.
Power on, configure, and update Ubuntu 🔗
Go ahead and click the Start button at the top of the screen to power both of the VMs on. You should be prompted first to select an ISO to boot from for the initial OS install. If you don’t have the Ubuntu Server 16.04 ISO yet, either download from the Ubuntu website or if you’re feeling particularly generous, download (and seed) the torrent version.
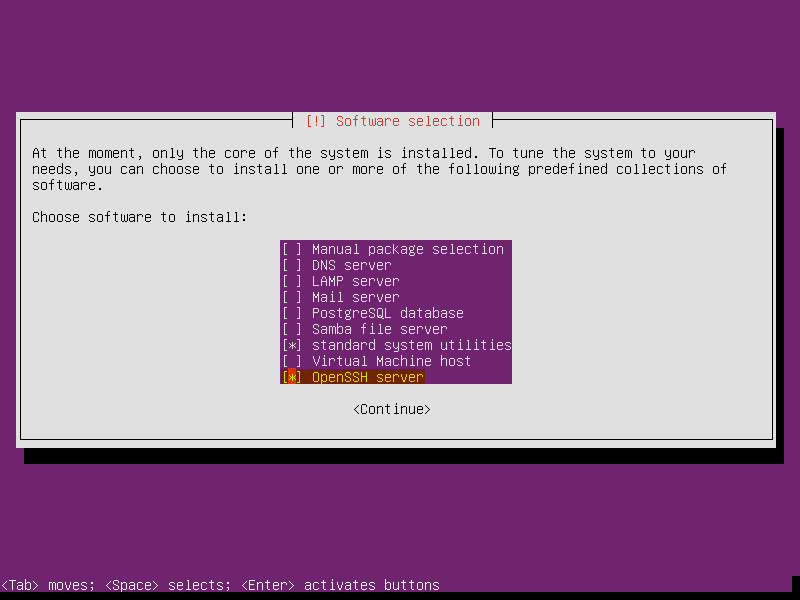
During the install, take all defaults, except for the hostname prompt. Enter Ubuntu-Splunk1 and Ubuntu-Splunk2 on the respective machines for their hostnames. And be sure to select the OpenSSH server package at the Software selection screen in addition to the standard system utilities.
Use any username and password, for example splunk1 and splunk1 for the username and password on the Ubuntu-Splunk1 server.
Once logged into the server, enter sudo apt update && sudo apt upgrade -y to update all of the packages for the system, and then upgrade the packages with the newest available versions.
Now you should be all ready for getting the network portion set up!
Set up the networking for internet and host communication 🔗
If you were curious before this point and ran ip a (or ifconfig if you’re a caveman), you’ll notice that your VM has an address that is probably 10.0.2.15. In fact, both of your Ubuntu VMs will most likely have that same IP address. That makes it a bit confusing for gaining SSH access to them, and to get to the web interface of Splunk after we’re able to get it all installed. This is the part I was referencing earlier that really threw me, having come from VMware Workstation Pro.
If you head into the settings of your VM (Right CTRL + S if you’re looking at the VM’s console), check out the Network tab. Adapter 1’s tab will show connected to NAT, and this is the VM’s default behavior.
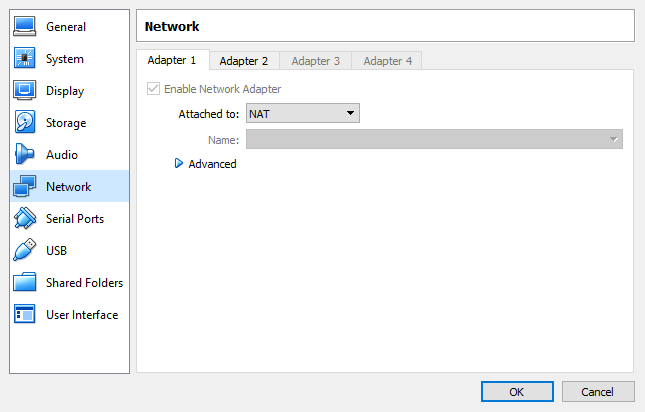
When the NIC is set to NAT, it only is able to talk out to the outside network, including out to the internet, which is how we were able to update earlier. Talking from the host machine to the VM isn’t allowed. Go ahead and close this box out for now.
Creating a new VirtualBox Host-Only Ethernet Adapter 🔗
What we’ll want to do is set up a new VirtualBox Host-Only Ethernet Adapter for this VM to also connect to so we can SSH into the box and access its web interface after Splunk is installed. To set this up, go back to the main VirtualBox window, and click the down arrow next to Global Tools and then choose Host Network Manager to get a screen similar to the one below. Click the Create button to make a new network for us to use.
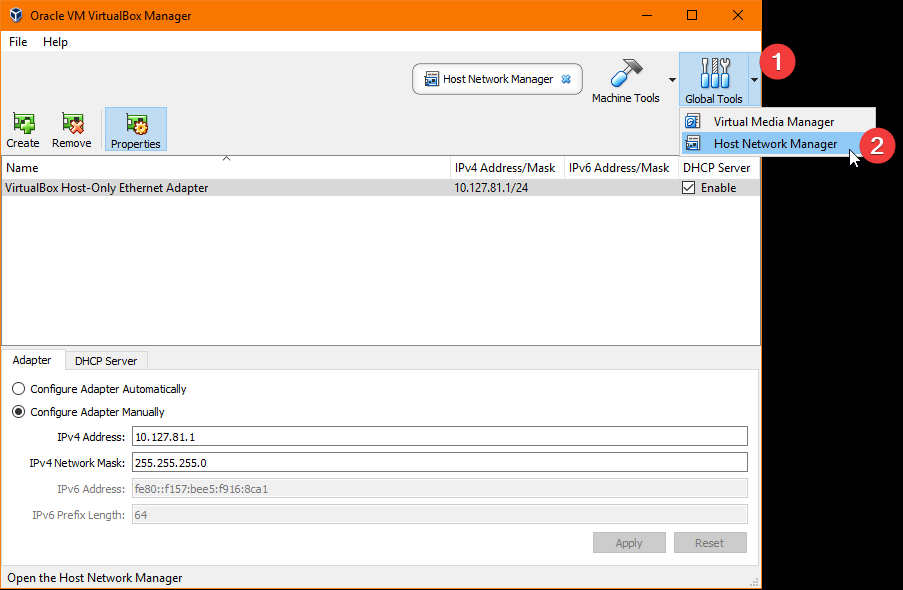
By default, the IPv4 Address should be 192.168.56.1, but I like to complicate things and make it a weird address that hopefully shouldn’t be used by anything else, at least not at work. Next, while it’s not necessarily needed, I would recommend going to the DHCP Server tab and enabling DHCP. Otherwise, you’ll have to enter manual IP addresses later instead of telling the interfaces to use the DHCP protocol.
Adding the new adapter to your VMs 🔗
Head back into the settings of both VMs while they’re powered off, and go back to the Network tab. Under Adapter 2, check the box for Enable Network Adapter, and then choose the network that you set up in the previous step. Make sure this is the same for both VMs to enable talking between them later.
Configuring the new interface in the VMs 🔗
You will need to configure the new interface so it knows how it should talk to the rest of the network. You’ll want to run sudo nano /etc/network/interfaces to edit the network interfaces settings. Enter the password you set up in the original configuration of the VM to proceed as root.
Once this file is opened, add the following lines to the end:
auto enp0s8
iface enp0s8 inet dhcp
Then hit the key combo of CTRL + X to exit, and enter y at the prompt to overwrite the file.
Now run sudo systemctl restart networking to get the interface to pick up on the new DHCP settings. Re-enter ip a to see if your new settings have been applied successfully, and you should now show the new settings on the interface enp0s8:
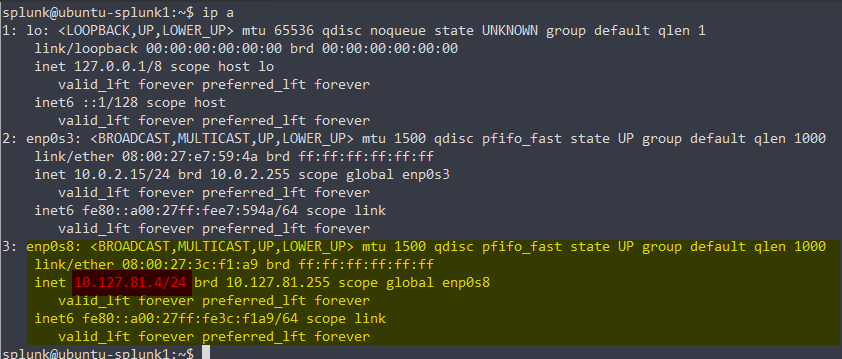
Now that we have set up this interface, we will be able to connect from our host machine to the VM to access SSH and the web interface of Splunk. Note the IP address received for enp0s8 in this step. This will be how you’ll set up PuTTY or other SSH client to access the VM.
Getting Splunk 🔗
You will need to create a Splunk account if you don’t already have one, this is covered in Section2, Lecture 7 of the course.
In summary, you will need to get the wget string provided by Splunk on the download page and paste that into your terminal to download all of the Splunk files. I would recommend getting the .tgz version.
Moving the Splunk files 🔗
Once you’ve downloaded the tarball for Splunk, I have followed the instructions in the video and moved the whole file to /opt by entering mv splunk-7.1.1-Linux-x86_64.tgz /opt. After it is there, cd to /opt and unzip with the command tar xvzf splunk-7.1.1-Linux-x86_64.tgz.
While in the /opt directory, cd into the splunk/bin directory, and run ./splunk start --accept-license to start the Splunk service and test out if it’s all working. If you’re prompted to set an admin password, that’s a good sign. You should then be able to visit the IP of the VM on port 8000, e.g. 192.168.56.101:8000 and log in with the username of admin and the password you were prompted to set earlier.
If you’ve made it this far, you’re almost set!
Starting Splunk with the VM 🔗
To make things easier, we’ll have Splunk start with the VM so we don’t have to log in and manually start it each time.
There are a few ways to do this, but I prefer editing the rc.local file. On Ubuntu, type in sudo nano /etc/rc.local to start editing the file. Al of the lines should be commented out except the last line of exit 0.
What you’ll want to do is enter the highlighted line below to get Splunk to start with Ubuntu.
#!/bin/sh -e
#
# rc.local
#
# This script is executed at the end of each multiuser runlevel.
# Make sure that the script will "exit 0" on success or any other
# value on error.
#
# In order to enable or disable this script just change the execution
# bits.
#
# By default this script does nothing.

/opt/splunk/bin/splunk start --accept-license

exit 0
Now, if you reboot the VM and have the console open, you should see a similar boot message to what you saw earlier when you started the Splunk binary manually:
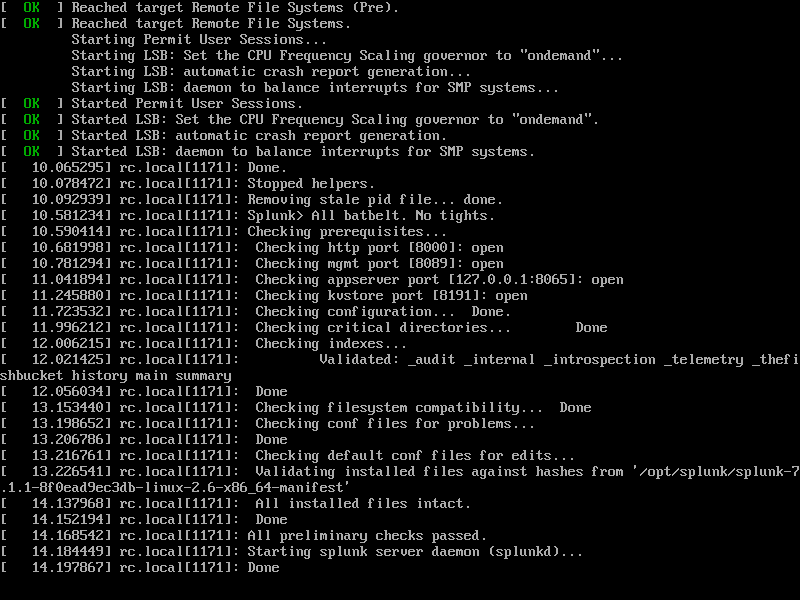
This means that Splunk is successfully starting during the boot process of the VM. Double check by rebooting again, wait a few seconds and then try reloading from your browser to make sure you’re still getting the login screen.
Fin 🔗
Now, be sure to go through all of these steps on both VMs. You should then be able to start both of them headless, and have Splunk automatically load up so you can access the web interface within seconds when you get back to work on this course.
I had a good time getting this configured in a somewhat containerized way, and I have a solid foundation for other local environments that I’m sure I’ll create for other Udemy or general training/labbing purposes.
Thanks for making it this far if you’re still with me!


